
 by
by Are you a Data Scientist and tired of wasting time creating interfaces to interact with your machine learning models? Gradio is then the right solution to allow you to easily create forms. You will then be able to publish these input forms (and visualization of results) and even retrieve information from your users. Are you interested in Gradio? follow me, we will see together how to get started with this little Python framework and in a few minutes deploy several forms.
Index
Installation
The installation is pretty simple, just use pip in your command line :
pip install gradio
Note: if like me you are using Google colab, then it will suffice to place the above pip command directly in a cell (the first) of the notebook.
Once installed, you must of course import the Gradio library:
import gradio as gr
First test
Let’s start with something very simple, a small form with input data (textual) and output data (also text). The Gradio syntax is really simplified to the maximum, you have:
- The function that performs the desired processing (you can imagine here the model retrieval, then the prediction). This function takes as arguments the input data (in order) and the output data (in order too) that were referenced in the gr.Interface method.
- The call to the gr.Interface method which allows you to define the processing function (callback), and the input / output interfaces.
def test_1(name):
  return "Vous avez entré cette valeur: " + name + "!"

gr.Interface(fn=test_1,
             inputs="text",
             outputs="text").launch()
The call to the Launch () function displays the form:
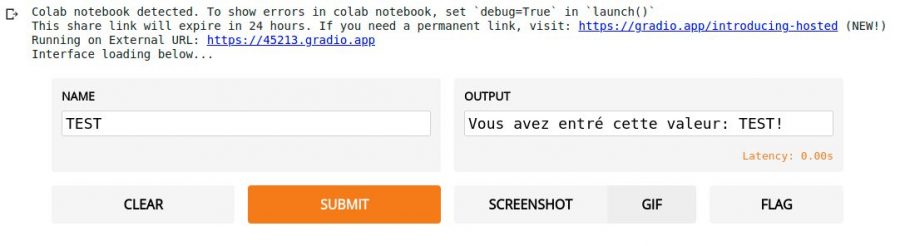
The form is directly integrated into the notebook but you can also use your browser and go to the address: https://45213.gradio.app
Make your entry (above I typed TEST) … click Submit and see the result of running the test_1 () function in the output value OUTPUT. You can also retrieve a screenshot of the form via the SCREENSHOT button.
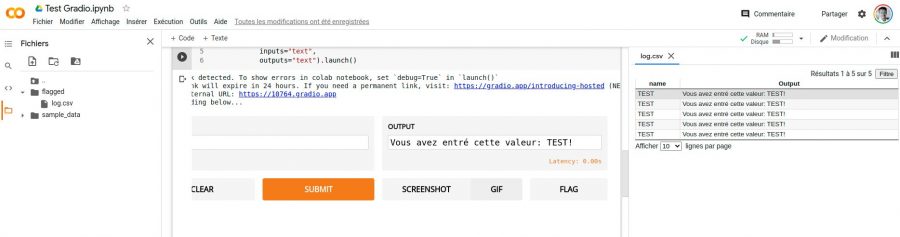
If you click the FLAG button, a directory (/ flagged) with a log.csv file is automatically created and lists the input / output data for you:
Create several entries
Gardio is very flexible thanks to its object approach. To put it simply, each input / output can be configured via an object. In the example below we have 2 objects in1 and in2 corresponding to the two inputs, and an object out1 which corresponds to the output area. We can thus create as many inputs / outputs as we want, just place these objects in a Python array for the inputs and outputs parameters of the Interface object:
def test_2(in1, in2):
  return "Vous avez entré cette valeur: " + in1 + " et" + in2

in1 = gr.inputs.Textbox(lines=2, placeholder="Message 1")
in2 = gr.inputs.Textbox(lines=2, placeholder="Message 2")
out1 = gr.outputs.Textbox()

form = gr.Interface(fn=test_2,
             inputs=[in1, in2],
             outputs=[out1])
form.launch()
Customize entries
Let’s now see the types of I / O that Gardio supports in order to be able to create forms. You can thus create:
- Text boxes
- Radio buttons
- Checkboxes
- Image or file capture (upload)
- Dropdown lists
- Slides (to choose numbers / discrete values)
Let’s see how to configure these input methods.
Text Box Configuration
We have already seen these text boxes in the previous examples.
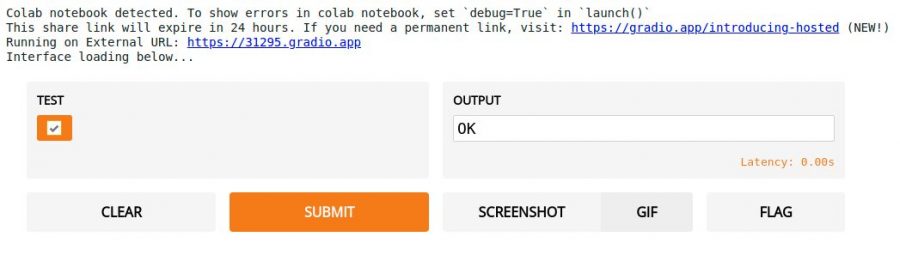
Check box Configuration
Checkboxes are managed via the Checkbox object
def test_3(val):
  if (val):
    return "OK"
  else:
    return "KO"

in1 = gr.inputs.Checkbox(label="test")
gr.Interface(fn=test_3,
             inputs=in1,
             outputs="text").launch()
Choices Configuration (categorical data)
Two possibilities here: you can use option buttons or a drop-down list.
The (radio) options are managed via the Radio object. Of course, you must specify when initializing this object the different available choices (choices attribute):
def test_4(val):
  return val

in1 = gr.inputs.Radio(choices=["Val 1", "Val 2", "Val 3"])
gr.Interface(fn=test_4,
             inputs=in1,
             outputs="text").launch()
The drop-down list is handled in exactly the same way except that you have to use the Dropdown object instead of the previous Radio object.
in1 = gr.inputs.Dropdown(choices=["Val 1", "Val 2", "Val 3"])
gr.Interface(fn=test_4,
             inputs=in1,
             outputs="text").launch()
Slider configuration
This widget allows you to choose a discrete numeric value.
For this, we use the Slider object with some options such as minimum and maximum values, and possibly the step (default is 1)
def test_4(val):
  return val

in1 = gr.inputs.Slider(minimum=10, maximum=20, step=2)
gr.Interface(fn=test_4,
             inputs=in1,
             outputs="text").launch()
Image Upload configuration
Of course Gradio allows you to upload an image (but also a file via another object) using the Image object. There is even the possibility to specify the size of the expected image (with the shape attribute):
in1 = gr.inputs.Image(shape=(100,100))
gr.Interface(fn=test_4,
             inputs=in1,
             outputs="image").launch()
Examples
To finish this post I would like to show you one last particularly interesting feature that allows you to provide the user with default form data. To do this, itsuffices to specify the values of the different inputs in an array via the examples = [] attribute
def test_1(txt1, txt2):
  return "Vous avez entré cette valeur: " + txt1 + " et " + txt2

form = gr.Interface(fn=test_1,
             inputs=["text", "text"],
             outputs="text",
             examples=[
                ["val1", "val2"],
                ["val3", "val4"],
                ["val5", "val6"]]
              )
form.launch()
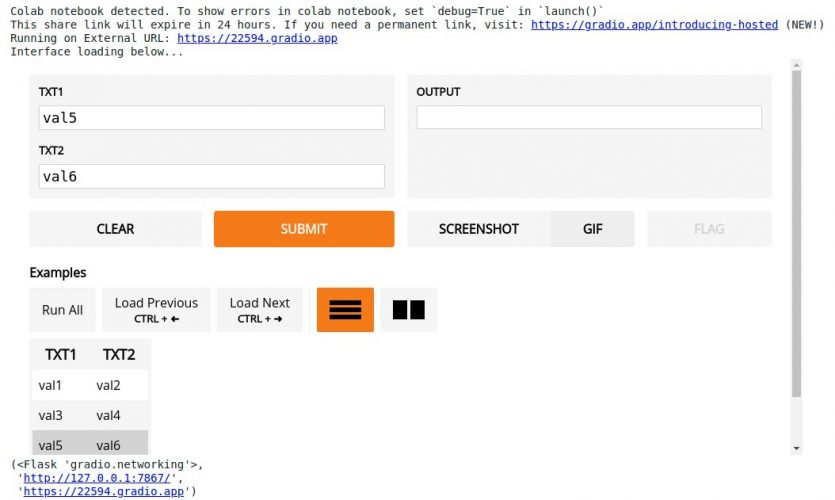
The user then only has to click on the values offered in the bottom form to automatically enter the input values.
Conclusion
This small framework is really very useful to provide an User Interface (rather of course for the tests). In a few lines you have very simply configured a web form which is then available to your users. Gradio uses Flask and distributes these forms, but it is also possible to use a hosted version of Gradio by going to their site: https://www.gradio.app/introducing-hosted