You are watching a “spy movie”. The suspense is panting and suddenly a policeman in the movie is looking at a surveillance camera in which a frame is drawn around a face. The character continues to move around the screen and the frame still follows his face … quite honestly, have you ever wanted to be able to do that? Obviously a few years ago it was science fiction, but today this type of treatment is as easy as pie.
So, follow the guide!
Index
OpenCV
First of all and regarding the prerequisites, we will be using Python (I am using version 3.7) as well as OpenCV 4.
Note: We have already used this library for facial recognition in the article on identity cards. So I wouldn’t go back to this much used Open Source library.
Let’s open a jupyter notebook and check that these two elements are functional:
import cv2 as cv
print(cv.getBuildInformation())
If OpenCV is properly installed you must have a rendering like this below, which specifies the version of OpenCV you are using (in my case 4.1.2):
General configuration for OpenCV 4.1.2 =====================================
  Version control:               4.1.2

  Platform:
    Timestamp:                   2019-11-21T23:50:25Z
    Host:                        Linux 4.15.0-1028-gcp x86_64
    CMake:                       3.9.0
    CMake generator:             Unix Makefiles
    CMake build tool:            /usr/bin/gmake
    Configuration:               Release
...
Camera usage
Using the camera device is extremely easy with OpenCV. A single line is enough to use it (as long as the camera is available of course). In python we use the VideoCapture () method as follows:
webcam = cv.VideoCapture(0)
You will notice this method requests an index (here a zero) as an argument. This index is the index of the device you are accessing. In my case I only have one camera available so no real ambiguity: i’ll use the first one: 0
You must now check that the camera is ready to send back images. For that, you just have to test the returned webcam object:
webcam.isOpened()
TrueThe isOpened() method returns True if the camera is ready.
Launch the camera
A camera works like a photo “submachine gun”. Recovering a video stream therefore consists in recovering images in repetition and very quickly therefore. This is called the “frame rate” (F.P.S.), that is to say the number of frames that we are able to recover in one second. This frequency may be different depending on the type of broadcast and quality. For example, at the time of analogic televisions (PAL / SECAM) we had a rate of 25 images / sec.
Follwing the wikipédia definition :
Frame rate (expressed in frames per second or FPS) is the frequency (rate) at which consecutive images called frames appear on a display. The term applies equally to film and video cameras, computer graphics, and motion capture systems. Frame rate may also be called the frame frequency, and be expressed in hertz.
Wikipédia
In the code below we’ll display the video rendering in a new window:
if webcam.isOpened():
    while True:
        bImgReady, imageframe = webcam.read() # get frame per frame from the webcam
        if bImgReady:
            cv.imshow('My webcam', imageframe) # show the frame
        else:
            print('No image available')
        keystroke = cv.waitKey(20) # Wait for Key press
        if (keystroke == 27):
            break # if key pressed is ESC then escape the loop

    webcam.release()
    cv.destroyAllWindows()
Notice the infinite loop (line 2) which only ends when the user presses the ESC key (code 27). Then the webcam.read () method returns the image sent by the camera at time t (a bImgReady ballean specifies if an image has been successfully retrieved) on line 3. It is then sufficient to retrieve and process this image . In our case we will simply retrieve the images and display them.
The result is very simple, since we simply have to display a window with what the camera is filming in it:
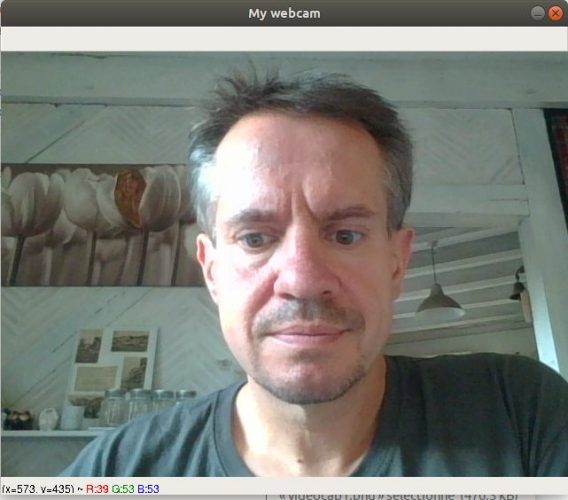
The flow must of course be quite clear, but we will now calculate the “frame rate” (FPS). Let’s click on ESC to close the window.
Frame Rate Calculation
To calculate this rate, no need to display anything, we will simply retrieve the images as we did previously and then count them. We will use Python’s time library:
from time import perf_counter
t1_start = perf_counter()
frame_count = 0
webcam = cv.VideoCapture(0)
NB_IMAGES = 100

if webcam.isOpened():
    while (frame_count < NB_IMAGES):
        bImgReady, imageframe = webcam.read() # get frame per frame from the webcam
        frame_count += 1

    t1_stop = perf_counter()
    print ("Frame per Sec.: ", NB_IMAGES / (t1_stop - t1_start))

    webcam.release()
    cv.destroyAllWindows()
Frame per Sec.: 25.694978989489766And there you have it, we have a rate of about 25 frames per second, which as I told you above is quite classic.
Facial recognition inside a video
And now let’s add a touch of artificial intelligence in the processing of the video stream. Good news, OpenCV includes as standard a classifier for pattern recognition: this is the Haar Cascade Classifier. Also in the good news, several pre-trained models are available and especially ready to use. There is recognition of face, eyes, smile, etc.
Note: we have already used this classifier in the article on identity cards.
Just create a routine to use this algorithm:
dirCascadeFiles = r'../opencv/haarcascades_cuda/'
# Get files from openCV : https://github.com/opencv/opencv/tree/3.4/data/haarcascades
classCascadefacial = cv.CascadeClassifier(dirCascadeFiles + "haarcascade_frontalface_default.xml")

def facialDetectionAndMark(_image, _classCascade):
    imgreturn = _image.copy()
    gray = cv.cvtColor(imgreturn, cv.COLOR_BGR2GRAY)
    faces = _classCascade.detectMultiScale(
        gray,
        scaleFactor=1.1,
        minNeighbors=5,
        minSize=(30, 30),
        flags = cv.CASCADE_SCALE_IMAGE
    )
    for (x, y, w, h) in faces:
        cv.rectangle(imgreturn, (x, y), (x+w, y+h), (0, 255, 0), 2)
    return imgreturn
This function uses a classifier (of which we must pass the _classCascade model file as argument). It takes an image and will therefore detect a shape in it (here we will first be on facial recognition), and returns the same image but with a frame around the recognized shape.
We will now use this function in our video stream (and therefore call it on each image retrieved):
def videoDetection(_haarclass):
    webcam = cv.VideoCapture(0)
    if webcam.isOpened():
        while True:
            bImgReady, imageframe = webcam.read() # get frame per frame from the webcam
            if bImgReady:
                face = facialDetectionAndMark(imageframe, _haarclass)
                cv.imshow('My webcam', face) # show the frame
            else:
                print('No image available')
            keystroke = cv.waitKey(20) # Wait for Key press
            if (keystroke == 27):
                break # if key pressed is ESC then escape the loop

        webcam.release()
        cv.destroyAllWindows()

videoDetection(classCascadefacial)

Move around and you will see the magic happening … the green rectangle will just follow your face ! any doubts ? try to ask someone else to come to the field and just see another rectangle with your partner’s face will appear.
Other recognitions
You can also detect eyes
classCascadeEyes = cv.CascadeClassifier(dirCascadeFiles + "haarcascade_eye.xml")
videoDetection(classCascadeEyes)
or just face profiles:
classCascadeSmile = cv.CascadeClassifier(dirCascadeFiles + "haarcascade_profileface.xml")
videoDetection(classCascadeSmile)
In brief, you just have to use the cascading files provided by OpenCV (Cf. https://github.com/opencv/opencv/tree/master/data/haarcascades) or by the community.
Conclusion
OpenCV is definitely a library full of resources. In a few lines of code, it is therefore possible to recover a video stream, detect shapes and modify the rendering of the video stream by adding color frames!
Get all the sources on my Github.
