Index
Introduction
Introduction
In this article we will see how we will be able to recover information (photo, and other information) from a scanned identity card. The idea is to put into practice the previous articles on facial recognition and text recognition (with tesseract).
Here is the identity card that we will analyze:
Needless to say that this identity card is fictitious (and not only because Michael was not french !), however we will find the same difficulties as on a real one. We will use as Python language and the OpenCV and Tesseract libraries (for OCR). The first lines must not generate an error, otherwise you will have to import the libraries (don’t forget numpy, Image, etc.) via pip for example.
try:
    from PIL import Image
except ImportError:
    import Image
import pytesseract
from pytesseract import Output
import cv2
import numpy as np
from matplotlib import pyplot as plt
Cropping the photo
As we saw in the article on facial recognition, we will first recognize and trim the ID photo using OpenCV facial recognition.
Note: Use the haarcascade_frontalface_default.xml template for this type of detection.
imagePath = r'ci.jpg'
dirCascadeFiles = r'../opencv/haarcascades_cuda/'
image = cv2.imread(imagePath)
gray = cv2.cvtColor(image, cv2.COLOR_BGR2GRAY)
cascadefile = dirCascadeFiles + "haarcascade_frontalface_default.xml"
classCascade = cv2.CascadeClassifier(cascadefile)
faces = classCascade.detectMultiScale(
    gray,
    scaleFactor=1.1,
    minNeighbors=5,
    minSize=(30, 30),
    flags = cv2.CASCADE_SCALE_IMAGE
)
print("Il y a {0} visage(s).".format(len(faces)))
# Coordonnées des rectangles des visages détectés (x, y, w, h)
for (x, y, w, h) in faces:
    cv2.rectangle(image, (x, y), (x+w, y+h), (0, 255, 0), 2)

plt.imshow(image)
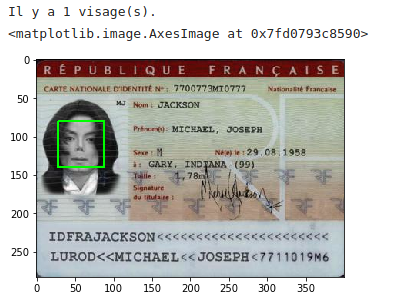
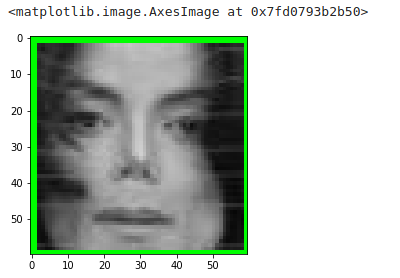
No difficulties to report, OpenCV detects the face very well and we can therefore extract it simply by doing a slicing operation with numpy:
f = faces[0]
plt.imshow(image[f[1]:f[1]+f[3], f[0]:f[0]+f[2]])
Retrieving other information
The objective is now to retrieve the textual information of the identity card. Let’s try tesseract directly on the source image:
print(pytesseract.image_to_string(image))
REPUBLIQUE FRANCAISE
‘CARTE NATIONALE DIDENTITE Ne 7700773MIO777__Nationaité Francaise
MS Nom! JACKSON

Prtnomiy: MICHAEL, JOSEPH

Sexe: H Nef le: 29.08, 1958

IDFRAJACKSON<<<<<<<<
We somehow recover the various information. However, there are many interpretation errors (Prtnomiy instead of First name (s), etc.) which may make it difficult to intelligently retrieve the various elements. This may be due to the complex background of the ID card (watermarks and the like) which make it difficult to tesseract. Let's try to retouch the image (by adjusting the thresholds, gray levels, etc.):
# Niveaux de gris
def grayscale(image):
    return cv2.cvtColor(image, cv2.COLOR_BGR2GRAY)
# Réduction de bruits
def remove_noise(image):
    return cv2.medianBlur(image,1)
# Seuillage
def thresholding(image):
    return cv2.threshold(image, 200, 255, cv2.THRESH_BINARY + cv2.THRESH_OTSU)[1]

finalimage = remove_noise(thresholding(grayscale(image)))
plt.imshow(finalimage)
texteCI = pytesseract.image_to_string(finalimage)
print(texteCI)
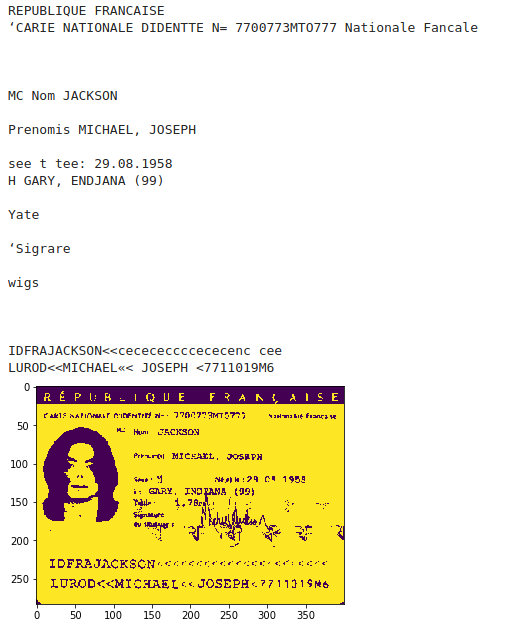
The result is hardly better in reality, so we will try a different approach.
Targeted approach
The quality of information being difficult to interpret, a good approach probably consists in targeting the information that we are going to send to tesseract. So we will cut the image into several pieces. Each piece must contain the information to be recovered. The ID card is rather a good example because the information is always placed in roughly the same place.
We will start by retrieving the coordinates of the frame containing the name. We need the point on the top left and the one on the bottom right. the easiest way is to open the image in a drawing tool (like pinta on ubuntu) and look at the coordinates when you hover the mouse (see frame at top right in red):
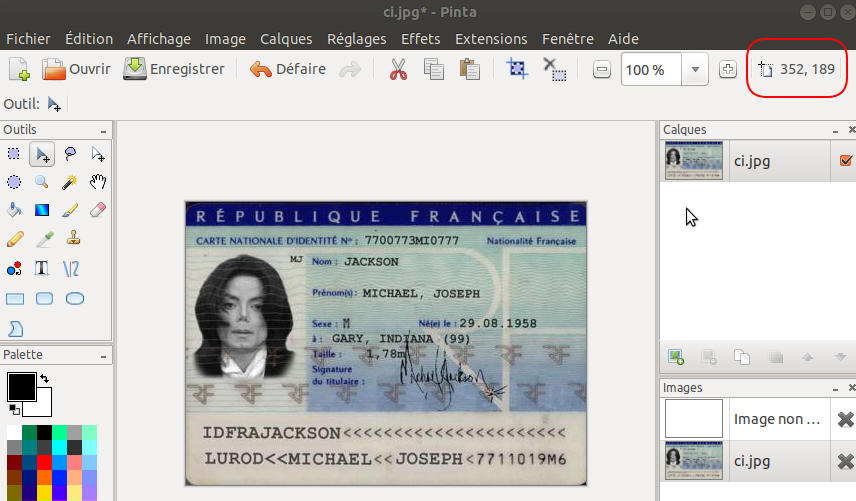
Once the two points have been recovered, it suffices to cut the image via a slicing operation with numpy. Let's check that the identification framework is the right one:
image = cv2.imread(imagePath)
x = 151
y = 49
w = 300
h = 69
plt.imshow(cv2.rectangle(image, (x, y), (w, h), (0, 255, 0), 2))
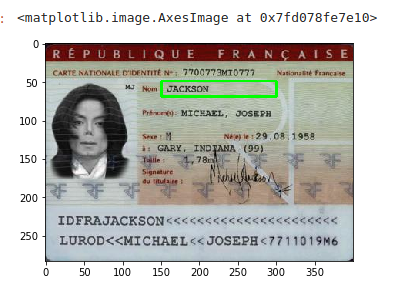
Now we can extract the image:
region_Nom = image[y:h, x:w]
plt.imshow(region_Nom)

Let's use tesseract on this cropped image:
region_Nom = remove_noise(thresholding(grayscale(region_Nom)))
NomCI = pytesseract.image_to_string(region_Nom)
print(NomCI)
JACKSONAnd ... after ?
It is now sufficient to apply the same method to the other areas to be recovered. A small downside all the same, we cut the image according to fixed coordinates. The concern is that there may be shifts when scanning the different identity cards: these coordinates may therefore not be good from one image to another. The technique therefore consists in locating a fixed element on the image (such as for example the R for French Republic at the top) and making it the reference point for the locating coordinates.
As usual you will find the codes for this article on GitHub.


