 by
by Index
What is Tesseract?
Tesseract is an OCR (Optical Character Recognition) type IT tool .
The role of OCR is to convert a two-dimensional image containing text (printed or handwritten text) from its image representation into readable text and above all usable by a computer. From a point of view of its operation, an OCR is generally broken down into several sub-processes that are executed sequentially.
Here are the common steps:
- Image preprocessing
- Text localization
- Character segmentation
- Character recognition
- Post treatment
Note that an OCR (here tesseract) can analyze other types of unstructured files. The objective here is not to explain how an OCR works but above all to make you understand that its mode of operation can be quite complex. So be indulgent when you don’t immediately find the expected result 😉

For the record (of tesseract) I will simply refer to Wikipedia :
Designed by Hewlett Packard engineers from 1985 to 1995, its development was abandoned for the next ten years; in 2005, the sources of the software were published under the Apache license and Google continued its development. Initially limited to ASCII characters, it recognizes UTF-8 characters in over 100 languages.
Environment installation
Installation of Tesseract
Of course you will find plenty of information on how to install Tesseract on GitHub ( https://github.com/tesseract-ocr/tesseract ) and its official wiki . However, if you are like me an avid Ubuntu user, I will guide you through the installation of Tesseract and pytesseract (the Python wrapper for Tesseract).
To start, you have to download the tesseract binaries, nothing could be simpler, open a terminal and run the following two commands:
# sudo apt install tesseract-ocr
# sudo apt install libtesseract-dev
Before installing pytesseract I suggest you install the country files (data files). Personally, I will recover the French, English (by default of course) and Spanish languages. to do this, run the following commands:
# wget https://github.com/tesseract-ocr/tessdata/archive/master.zip
# unzip master.zip
# cp tessdata-master/fra.traineddata /usr/share/tesseract-ocr/4.00/tessdata/
# cp tessdata-master/eng.traineddata /usr/share/tesseract-ocr/4.00/tessdata/
# cp tessdata-master/spa.traineddata /usr/share/tesseract-ocr/4.00/tessdata/
Installation of pytesseract
First of all, here is the official website of this API: https://pypi.org/project/pytesseract/
A simple command in a terminal is then enough to install the library (using PIP):
# pip install pytesseractNote: The files (especially for languages are mostly copied to /usr/share/tesseract-ocr/4.00
First test!
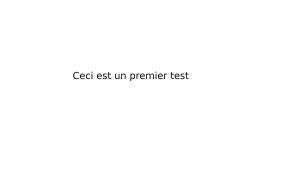
Let’s first check that our installation is operational and run a first test using the command line. Here is the file (really very simple) that we are going to use first:
Let’s open a terminal and type in:
# tesseract /home/benoit/git/python_tutos/tesseract/image_1.png fichier_resultat -l fra
Tesseract Open Source OCR Engine v4.0.0 with Leptonica
This command line recovers the first argument (file to process), and places the interpreted content in the second argument (here the file_resultat.txt) using the French language.
So let’s open the result file:
Ceci est un premier testLet’s use Python
Initialization with pytesseract
Now that tesseract is operational we will do our first test with pytesseract to see how we can use unstructured documents in a Python program.
First, let’s import the module (previously installed via pip in the paragraph above):
try:
    from PIL import Image
except ImportError:
    import Image
import pytesseract
First test
Then let’s perform a first test by asking tesseract to analyze the same file (I’m using Jupyter here, add a print if this is not your case):
print(pytesseract.image_to_string(Image.open('/home/benoit/git/python_tutos/tesseract/image_1.png')))
The output should tell you:
'Ceci est un premier test'If this is the case, it means that your installation is fully operational and that you have analyzed your first image.
pytesseract Methods
If you get an error telling you that tesseract is not installed or that the command cannot find the executable file, it probably means that the executable is not in your Path. You must then specify where tesseract is explicitly via the prior command:
<pre class="wp-block-syntaxhighlighter-code">pytesseract.pytesseract.tesseract_cmd = r'<Chemin complet pour lancer l exécutable en ligne de commande>'</pre>
Now let’s get more information using the other possible methods of the pytesseract object:
- get_tesseract_version () Returns the version of Tesseract installed in the system.
- image_to_string () Returns the result of an OCR Tesseract executed on the string image
- image_to_boxes () Returns a result containing recognized characters and their box limits
- image_to_data () Returns the result containing the box boundaries, confidences, and other information. Requires Tesseract 3.05+. For more information, please see the Tesseract TSV documentation
- image_to_osd () Returns a result containing information about orientation and script detection.
- run_and_get_output () Returns the raw output of Tesseract OCR. Gives a little more control over the parameters sent to tesseract.
Recovery of detected items
Let’s start by retrieving the coordinates of the textual elements of the image:
print(pytesseract.image_to_data(Image.open('/home/benoit/git/python_tutos/tesseract/image_1.png')))
level	page_num	block_num	par_num	line_num	word_num	left	top	width	height	conf	text
1	1	0	0	0	0	0	0	1920	1080	-1
2	1	1	0	0	0	469	458	738	60	-1
3	1	1	1	0	0	469	458	738	60	-1
4	1	1	1	1	0	469	458	738	60	-1
5	1	1	1	1	1	469	458	122	48	96	Ceci
5	1	1	1	1	2	621	461	89	45	95	est
5	1	1	1	1	3	737	470	67	36	95	un
5	1	1	1	1	4	835	458	207	60	96	premier
5	1	1	1	1	5	1051	461	156	45	96	test
From now on you will not only be able to process textual elements but also their placement in the image using the coordinates provided by this command.
What about orientation
To retrieve other information such as orientation for example, use this command:
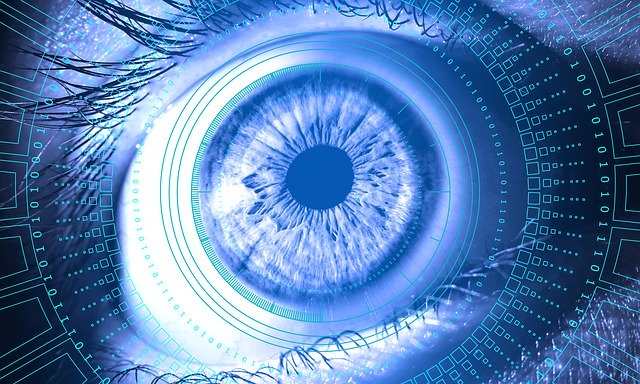
print(pytesseract.image_to_osd(Image.open('/home/benoit/git/python_tutos/tesseract/image_2.png')))
Page number: 0
Orientation in degrees: 0
Rotate: 0
Orientation confidence: 2.01
Script: Latin
Script confidence: 11.11
Conclusion
We have just seen how to use tesseract in an extremely simple (noiseless) context. We will see in a later article how to make more advanced use of tesseract when the image is not as perfect as this example.
Indeed, if tesseract is very effective on “clean” images, it is not the same as soon as noise is added. A crossed out image, with a grid, or even color changes will disrupt our beautiful OCR tool to produce erroneous results. Prior work will therefore be necessary to be able to remove all these noises and therefore recover and interpret the texts of our images.
NB: you can get my Notebook on Github